rangerovers.pub
The only place for a coil spring is up Zebedee's arse
Member
Joined:
Posts: 2448

Well it's £100 in parts for a full gasket set and a set of stretch bolts from Island (10 bolt engine, is that correct?)
I've never done a headgasket solo before (I passed spanners for someone doing one on a BMW E30 years ago).
I've got a set of Torque wrenches and I know where the local machine shop to get the head skimmed.
Hmmmmmmm

https://www.island-4x4.co.uk/head-gasket-reinz-stc4082reinz-p-26600.html

https://www.island-4x4.co.uk/head-bolt-1994-da2141g-p-1208.html
OK £120 with the VAT :/

Member
Joined:
Posts: 127

I would suggest Arp Studs rather than bolts. Much less potential for damaging the threads in the block. AZ510A is the correct set.

Member
Joined:
Posts: 2448

Ten times the price - oof!
https://www.v8tuning.co.uk/fasteners-bolts

and that's cheaper than other places that are asking £250!

Member
avatar
Joined:
Posts: 8106

Just checked Real Steel and they are exactly the same price. But, as said, it does make the job easier, the heads can be torqued down more accuartely and evenly and less chance of future problems. Fit them and torque down to 65 ft/lb, none of this heaving on a bar to get 90 degrees and waiting for something to give.

Member
Joined:
Posts: 2448

OK well, that pushes it back a bit - I've just paid £700 for the Jeep and Duchess this month for bits and bobs. Mainly on the Jeep which got a new exhaust from the manifold back...
Hey ho. I'll start assembling parts either way!

Member
Joined:
Posts: 676

When I’ve read the reviews of whether to use ARP studs or TTY bolts, they are mixed. Like Morat said, at 10x the price and mixed reviews, I went with new TTY bolts on both the P38 and Disco 2.
The studs would definitely be easier but I’m not convinced better otherwise.

Member
Joined:
Posts: 2448

I'm quite happy with pulling a big bar. Less happy to snap stretch bolts. I could take Chris's advice and torque the stretch bolts... he's been around! ;)
But, that's not a decision I need to take until I've got the head off and skimmed.

Member
avatar
Joined:
Posts: 8106

The problem with bolts is you don't know if they are an identical spec to original. If they are too soft and stretch too easily, the heads won't be held down as well as they should be so the head gasket will fail again. Too hard so don't stretch as much as they should and there's a risk of pulling the threads out of the block or snapping the bolts. With an engine out of the car, giving a long bar 90 degrees isn't a problem, trying to do it with the engine in the car is nigh on impossible as other things get in the way.

With the studs, you simply torque them down in two or three stages. I'd be interested to see reviews that have preferred bolts over studs as the only advantage I can see with them is cost.

Member
Joined:
Posts: 676

If quality control is poor as you’re suggesting (some too soft and some too hard), then the bolts aren’t a good idea. The idea of a stretch bolt is that it will hold the torque evenly, even if you don’t get the 90+90 exactly right, and hold it evenly through heat cycles and age. Properly made stretch bolts work really well.

Member
Joined:
Posts: 2448

Well, this is getting frustrating.

After the garage diagnosed an exhaust manifold I got a second hand one, had it skimmed and they swapped it. No change. So, you guys were right and the garage were wrong. Not a huge surprise there to be honest.

Now I'm in a dilemma. Do I just bring the Duchess home and attempt a DIY? Do I let the garage replace the HeadGasket? Should I do one or both HG?

I've got the parts, I know the machine shop I'd use. How long would a muppet take to do the work?

Member
avatar
Joined:
Posts: 8106

Usually the hardest part of changing a head gasket is getting the heat shield off the exhaust manifold, but, as the garage has already done it that's one stumbling block you won't have to deal with. HG isn't a difficult job, except for the aforementioned exhaust manifold heatshield, as long as you have the right tools. For the head bolts I use a 16mm spark plug socket as it is 6 point and 1/2" drive so you can give it plenty of grunt.

As for doing just one or both. While you are at it, you may as well do both, it'll take longer and you'll have to deal with the heatshield and the bastard to get at rear exhaust manifold bolt on the driver's side (taking the wheelarch liner out and going in from there makes that easier, might make the heatshield easier too, at least you'll be able to see what you are doing). You'll be surprised at how quickly it will come apart. Follow the steps in RAVE and the head should be off in 3-4 hours, less for the second one as the inlet and stuff at the top will already be off. Cleaning up faces while waiting for the head(s) to be skimmed are likely to take longer if you do it properly.

Member
Joined:
Posts: 2448

Thanks Richard. I've asked them for a quote this time - I suspect that'll influence my decision!

Member
Joined:
Posts: 2448

OK, some progress to report!
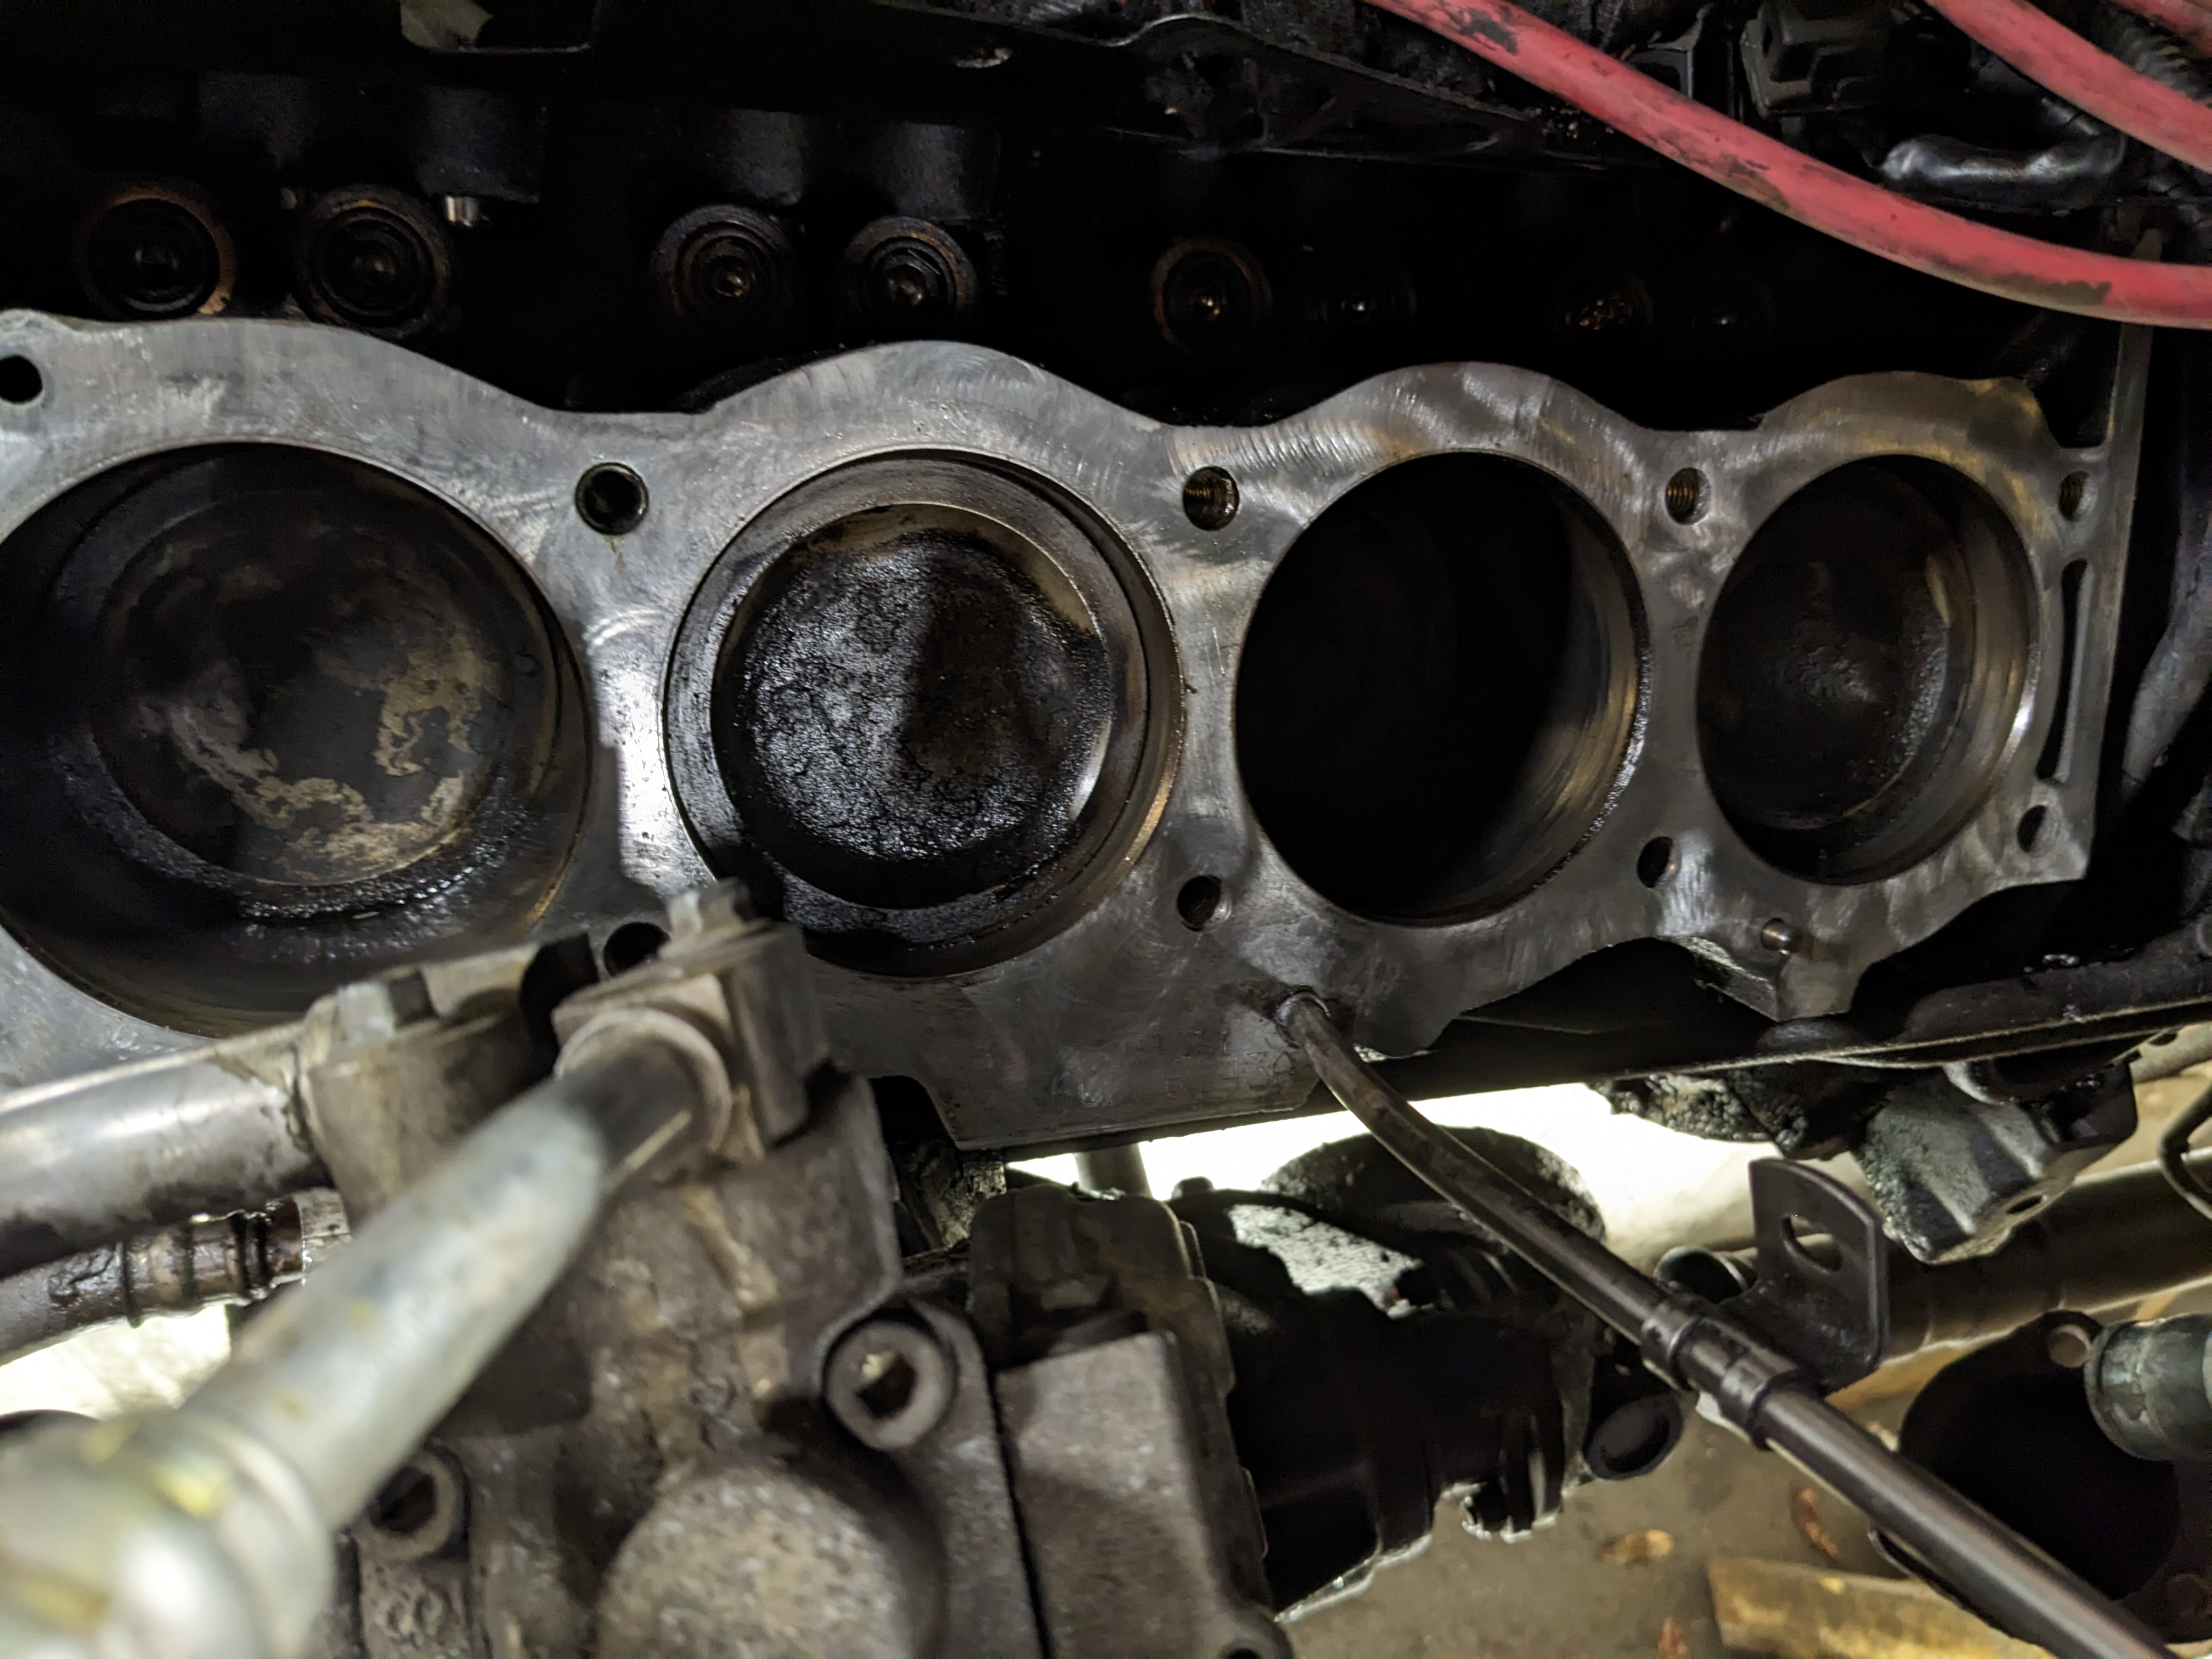
The HG had a nice big hole in the side - luckily the block doesn't appear to have suffered so I'm just getting one side done. I hope this cheaping out doesn't bite me on the arse in a month's time but I gues we'll just have to see.

There's only one "While we're at it" that we're aware of. This metal pipe to the intake is horrible and rusty. It seems to be one of these: https://rimmerbros.com/Item--i-PEQ000030P1 which is available (yay) or I can pay an extra £20 for the Green Oval. I'm tempted to just get the cheap one powdercoated. What do you reckon?

Crusty old pipe!

In other news, the liners pass the fingernail test - so I'm hoping that the worrying ticking noise was just the HG in "pre-failure mode". Unless it was the other bank, of course! :)

Here's hoping

Member
avatar
Joined:
Posts: 8106

I'd go for the cheaper pipe and slobber it in Hammerite paint (or just give the one you have a good wire brushing and slobber it in Hammerite). Where was the gasket blowing? Out the side or into the Vee? Into the Vee can usually be confirmed by the noise increasing if the oil filler cap is removed, out the side can often bee seen as flames coming out of the joint. However, this can only be seen from underneath and the joint will be concealed from view by the exhaust manifold, hence the original (wrong) diagnosis.

Member
Joined:
Posts: 2448

It came out of the side, hidden by the manifold as you say.
Hey ho, it's fun until it breaks - then it's extra fun!

Hammerite? EWW! (lol)

Member
Joined:
Posts: 804

Morat wrote:

OK, some progress to report!
The HG had a nice big hole in the side - luckily the block doesn't appear to have suffered so I'm just getting one side done. I hope this cheaping out doesn't bite me on the arse in a month's time but I gues we'll just have to see.

There's only one "While we're at it" that we're aware of. This metal pipe to the intake is horrible and rusty. It seems to be one of these: https://rimmerbros.com/Item--i-PEQ000030P1 which is available (yay) or I can pay an extra £20 for the Green Oval. I'm tempted to just get the cheap one powdercoated. What do you reckon?

Crusty old pipe!

In other news, the liners pass the fingernail test - so I'm hoping that the worrying ticking noise was just the HG in "pre-failure mode". Unless it was the other bank, of course! :)

Here's hoping

I'd do the one side if it was just the passenger side, but if it's the drivers's side that needs fixing then do both. I did the passenger's side alone, before I later had to go back in and do the driver's side, but I don't regret doing only one side the first time out because the driver's side was so much more painful in terms of getting the heat shield off and removing the steering column

Member
avatar
Joined:
Posts: 8106

It is the passenger side, you can see the dipstick. I would agree. We've no way of knowing why the gasket failed but either bolts not torqued evenly or one 'soft' stretch bolt is all that would be needed. So there is nothing to say the other one will suffer in the same way. The steering column does get in the way but I've found that taking the wheelarch liner out and going in from the side means you've got a lot easier access to the heatshield bolts, that pesky rear exhaust manifold bolt and the steering column can stay in place.

Member
Joined:
Posts: 676

I’m of course unfamiliar with the RHD issues, but I personally wouldn’t dig that deep without doing both gaskets, unless I had a good reason to believe that the opposite HG had been done properly recently.

Member
avatar
Joined:
Posts: 8106

I suspect the access problems would be the same doing the LH head on a LHD vehicle. Other than the bolts holding the heat shields in place being rusted solid and the heads corroded so much you can't get a grip on them, the steering column gets in the way making it even more awkward.

Member
Joined:
Posts: 2448

In a perfect world I'd pull the engine, install top hat liners and use unicorn lard to lubricate a set of brand new ARP studs but sadly I'm not in that world yet!
If the driver's side goes, that'll get done on its own too. The engine first started a very slight ticking years ago - in fact Marty noticed it when we (he) did the Heater Matrix. If that was the start of this issue then it took a looong time before it finally blew out the rest of the HG.